Starting an admin dashboard with Typescript, React and Tailwind
Table of contents
Introduction
Today we will start building a dashboard from scratch, not only using frontend tools but also building the api in the backend. Last post we start a simple crud application with bun, typescript and hono, we’re gonna work using that as a base to make our dashboard. I’m not entirely sure what the business logic will be, but I want it to have the following:
- Login/Register form
- Public and private routes
- Home page will show all corresponding metrics in cards and stats with some charts made with recharts
- Analysis section with a table made with react
- Maps section made with react-leaflet
We’re gonna make this like it’s a real life job where we get tickets and make tasks out of them to prepare you better.
Setup
- Go to https://github.com/brielov/react-app, and click
use templatethen create the template in your Github, then clone it. - Install shadcn
npx shadcn-ui@latest init - At the prompt commands do the following:
Would you like to use TypeScript? yes
Which style would you like to use? › Default
Which color would you like to use as base color? › Slate
Where is your global CSS file? › › src/main.css
Do you want to use CSS variables for colors? › yes
Where is your tailwind.config.js located? › tailwind.config.js
Configure the import alias for components: › @/components
Configure the import alias for utils: › @/lib/utils
Are you using React Server Components? › no- Install react router:
npx install react-router-dom- Install
react-hook-formwithnpm install react-hook-form - Install
zodfor input validation withnpm install zod
Auth task description
We’re gonna create a form component for our login and register forms.
Title: Create an auth form component Description:
- Use shadcn to build the component
- It should have two fields,
usernameandpassword - It should have a button with the text
LoginandRegisterfor its respective uses - It should have a prop to behave as
LoginorRegister - When user
loginit should take them to thehomeor/ - When user
registersit should take them to theloginor/login - The route should be
/loginorregister - The routes should be public routes
Use shadcn to build the component
Add form with npx shadcn-ui@latest add form, button with npx shadcn-ui@latest add button, card with npx shadcn-ui@latest add card, input with npx shadcn-ui@latest add input.
Create a folder inside components called auth and inside add auth-form.tsx.
We’re gonna create a form inside a card, lets do the imports first:
import {
  Form,
  FormControl,
  FormDescription,
  FormField,
  FormItem,
  FormLabel,
} from "@/components/ui/form";
import { z } from "zod";
import { useForm } from "react-hook-form";
import {
  Card,
  CardContent,
  CardDescription,
  CardFooter,
  CardHeader,
  CardTitle,
} from "@/components/ui/card";
import { zodResolver } from "@hookform/resolvers/zod";
import { Input } from "../ui/input";
import { Button } from "../ui/button";
Next let’s add the formSchema to validate our inputs:
const formSchema = z.object({
  username: z.string().trim().toLowerCase().email(),
  password: z.string().min(8).max(255),
});

export type FormValues = z.infer<typeof formSchema>;
The idea of the formSchema is to define the expected structure and data types for your form inputs. This ensures that only valid data gets submitted to your application, preventing unexpected errors or security vulnerabilities.
To get the type we use zod type inference capabilities in TypeScript to extract the type information from your formSchema.
Next we create our AuthForm component:
const AuthForm = () => {
  const form = useForm<FormValues>({
    resolver: zodResolver(formSchema),
    defaultValues: {
      username: "",
      password: "",
    },
  });
  return <Form {...form}></Form>;
};
The form object manages the state and behavior of your form, while the resolver is you’re essentially telling React Hook Form to use Zod to validate the form data based on the rules defined in your formSchema.
Now let’s add the rest of the components inside our form:
const AuthForm = (props: Props) => {
  const form =
    useForm <
    FormValues >
    {
      resolver: zodResolver(formSchema),
      defaultValues: {
        username: "",
        password: "",
      },
    };
  return (
    <Form {...form}>
      <form onSubmit={form.handleSubmit(props.onSubmit)}>
        <fieldset>
          <Card className="w-full max-w-sm">
            <CardHeader>
              <CardTitle className="text-2xl">Signup</CardTitle>
              <CardDescription>
                Enter your data below to signup.
              </CardDescription>
            </CardHeader>
            <CardContent className="grid gap-4">
              <FormField
                control={form.control}
                name="username"
                render={({ field }) => (
                  <FormItem>
                    <FormLabel>Username</FormLabel>
                    <FormControl>
                      <Input
                        type="email"
                        placeholder="enter email"
                        {...field}
                      />
                    </FormControl>
                    <FormDescription>
                      We wont share your email with anybody.
                    </FormDescription>
                    <FormMessage />
                  </FormItem>
                )}
              />

              <FormField
                control={form.control}
                name="password"
                render={({ field }) => (
                  <FormItem>
                    <FormLabel>Password</FormLabel>
                    <FormControl>
                      <Input
                        type="password"
                        placeholder="enter password"
                        {...field}
                      />
                    </FormControl>
                    <FormDescription>
                      Try to make it as secure as possible.
                    </FormDescription>
                    <FormMessage />
                  </FormItem>
                )}
              />
            </CardContent>
            <CardFooter>
              <Button type="submit" className="w-full">
                Sign up
              </Button>
            </CardFooter>
          </Card>
        </fieldset>
      </form>
    </Form>
  );
};
We added some tailwind classnames to make it look better and a onSubmit prop.
The pattern is basically use the Form from our components folder which will wrap a common HTML form and inside we will show a card which will have a header and a body, where inside the body we put our form fields for username and password, where each will render an item which wraps a Label, the Input component and a description.
Routes
Create a folder called routes and inside add a file called signup.tsx.
import { z } from "zod";
import AuthForm from "@/components/auth/auth-form";

const formSchema = z.object({
  username: z.string().trim().toLowerCase().email(),
  password: z.string().min(8).max(255),
});

type FormValues = z.infer<typeof formSchema>;

export default function SignupRoute() {
  function onSubmit(values: FormValues) {
    console.log("Succesfully registed", values.username);
  }

  return (
    <div className="min-h-screen flex items-center justify-center px-4">
      <AuthForm onSubmit={onSubmit} />
    </div>
  );
}
We will add its respective functionalities later on. For now lets add the following inside our app.tsx file:
import { Route, Routes } from "react-router-dom";
import SignupRoute from "./routes/signup";

export default function App() {
  return (
    <Routes>
      <Route path="/signup" element={<SignupRoute />} />
      <Route path="/" element={<div>Hello</div>} />
    </Routes>
  );
}
And in main.tsx:
import { StrictMode, Suspense } from "react";
import { createRoot } from "react-dom/client";
import { BrowserRouter } from "react-router-dom";
import "./main.css";
import App from "./app.tsx";
const rootNode = document.getElementById("root")!;
rootNode &&
createRoot(rootNode).render(
<StrictMode>
<Suspense fallback="Loading...">
<BrowserRouter>
<App />
</BrowserRouter>
</Suspense>
</StrictMode>,
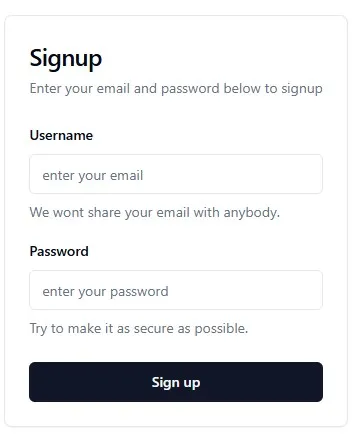
);Finally run npm run dev and go to /signup to see:
Conclusion
We succesfully set the project and made our first component! We need to make it better but its a good start and didn’t want to make it longer. We need to make it behave differently for when its login or register since its basically the same component, but we will do that on the next one.
See you on the next post.
Sincerely,
Eng. Adrian Beria.